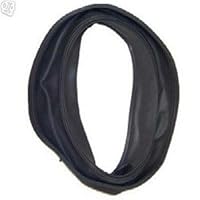
- Kenmore Sears Washer Door Boot Seal Gasket 8181662-KE

Appliance Parts US shipped the part quickly and the installation was fairly easy (and might be fun if you enjoy logic puzzles).
Tips:
-This part was a perfect fit for my Kenmore HEt3 washer (mfg. circa 2001, model 110 42922 200).There seem to be several part numbers for the same gasket. I found a couple aliases on the sears website, where they say that part #x is the same as part #y.
-Don't try to guess the order you need to remove parts. Watch this video (or one like it) before --and during-the repair: [search youtube for "Door Boot Seal Replacement" amazon blocked my link]
-Kenmore/Sears makes the process more difficult that it probably needs by using odd screws and connectors.You'll need a Torx screwdriver (for the star-headed screws) and a 9/32" socket driver for the internal boot clamp (the video shows it with a screw-type clamp).
-Finding that you have hole in the door seal is the first challenge. I found mine by taking off the bottom panel and then running the washer and looking for dripping water...SPLASH was more like what I found.
-Putting the spring loaded clamp back on is tricky and pulls the boot off if you're not doing it right. I finally figured out that you can easily spread it out using two small screwdrivers (the video mentioned something about it but I didn't listen).
-On my washer, the door wiring was connected to the door with an extra plastic harness not shown in the video.I found that it was easier to unscrew the latch assembly from the door frame rather than disconnect the wires.There are 3 or 4 star-screws on the door front holding it on and it went back on easily.Don't mix these screws with the others you've removed...they have washers and may be a little shorter (forgot to look).
-Chances are you will be showing a lot of plumber's crack during the replacement process. Dress appropriately.

0 comments:
Post a Comment